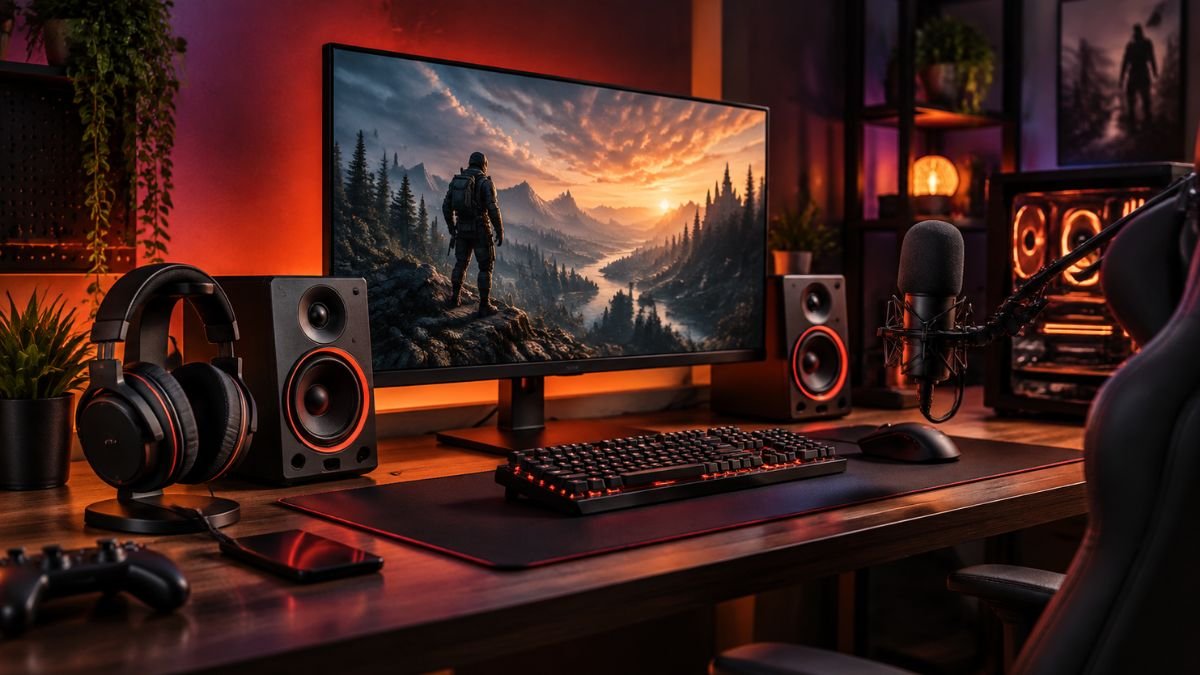
A gaming audio setup combines the devices, connections, and software settings used to hear game sound and communicate with other players. A practical setup can use a headset, headphones, speakers, and a microphone.
The right configuration depends on your platform, room, connection options, and whether you prioritize private listening, voice chat, or room-filling sound.
Gaming audio can seem simple until several devices appear in the same setup. A PC may detect monitor speakers through HDMI, a USB headset, Bluetooth headphones, desktop speakers, and a separate microphone at the same time.
Choosing the wrong input or output can leave you with no sound, an inactive microphone, or game audio playing through the wrong device.
That is not an unusual configuration problem. Microsoft specifically recommends checking the selected output device when multiple audio outputs are connected and notes that USB or HDMI devices may need to be set as the default playback device in Windows.
A good gaming audio setup therefore is not about adding as much audio hardware as possible. It is about building a clear signal path: the game produces audio, the system sends it through the correct connection, and the right device reproduces it at a comfortable level.
If voice chat is involved, the microphone creates a second path in the opposite direction.
This guide focuses on understanding and configuring those pieces rather than recommending specific products.
By the end, you should know how headsets, speakers, microphones, wired and wireless connections, system settings, and spatial audio fit together—and which parts actually matter for the way you play.
What You Need for a Gaming Audio Setup
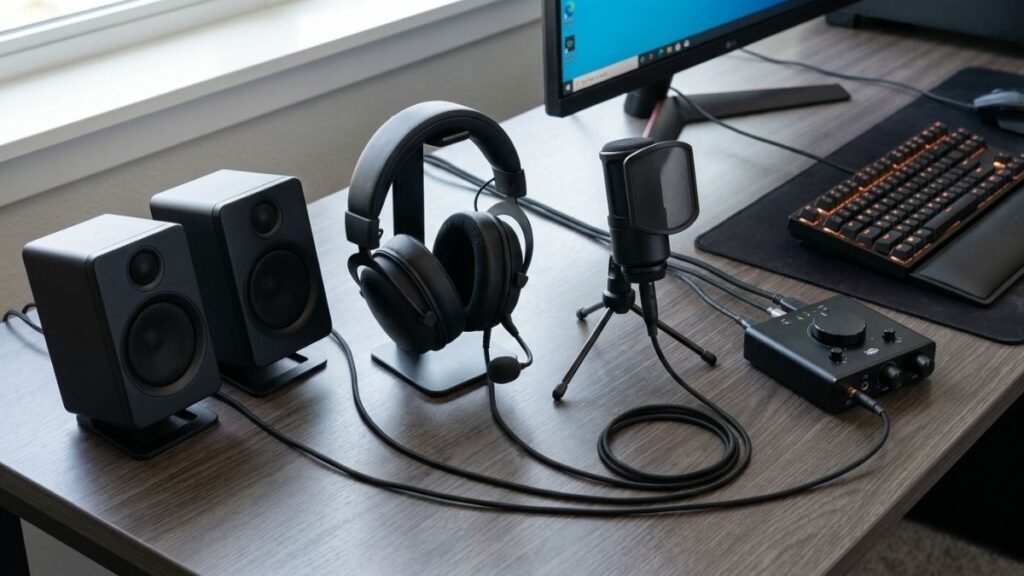
A gaming audio setup does not need to be complicated. At its core, it needs an audio source, a way to deliver that sound to you, and—if you use voice chat—a way to capture your voice.
For many players, a headset handles both listening and communication. Other setups separate those functions by combining headphones or speakers with a standalone microphone.
More advanced configurations may also include a DAC, amplifier, audio interface, or mixer, but these devices are not automatically necessary for better gaming audio.
The important part is understanding the role of each component before adding more hardware. A complete collection of gaming setup accessories can include many devices, but an effective audio system should remain as simple as your actual needs allow.
Headset or Headphones
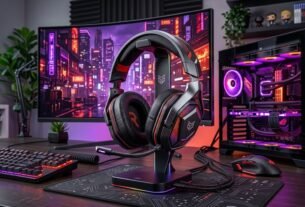
A gaming headset combines headphones and a microphone into one device. This makes it a straightforward option for gaming systems where voice chat, multiplayer communication, or private listening is common.
Headphones perform the listening side of the system but typically do not include the boom microphone associated with a gaming headset. They can still be used for gaming, especially when paired with a separate microphone.
The distinction matters because the two approaches create different signal paths. With a headset, audio output and microphone input may travel through the same USB connection, wireless receiver, or analog cable.
A separate headphone-and-microphone arrangement can require different ports and independent system settings.
Understanding gaming headset technology is useful here because drivers, microphones, connectivity, and onboard audio processing can all influence how a headset integrates with the rest of the setup.
For an authority-focused setup, the question is not whether a headset or headphones are universally better. It is whether the device matches the way the system will actually be used.
Gaming Speakers
Speakers move gaming audio away from your ears and into the room. A basic gaming speaker setup may use two speakers for left and right stereo channels, while other configurations can include a subwoofer or additional channels.
Speaker placement becomes important because the physical position of the speakers affects the stereo image you hear. Left and right channels should remain identifiable rather than sounding as though all audio comes from one point.
Speakers also introduce room acoustics into the equation. Walls, hard surfaces, furniture, distance, and listening position can influence how sound reaches the player. This means a gaming setup with speakers often requires more attention to physical positioning than a headset-based system.
Speakers make the most sense when private listening and microphone isolation are not priorities. If voice chat is involved, sound coming from the speakers can potentially reach the microphone, making microphone placement and volume control more important.
Microphone
The microphone is the input side of a gaming audio setup. It captures your voice for multiplayer communication, streaming, recording, or other applications that need audio input.
A microphone can be built into a headset or operate as a separate device. In either case, microphone quality depends on more than the microphone itself. Distance from the mouth, input gain, background noise, positioning, and software processing can all affect the signal.
Microphone gain controls how strongly the incoming microphone signal is amplified. Setting it too low can make speech difficult to hear, while excessive gain can increase unwanted room noise and make distortion more likely.
This is why increasing microphone gain should not be the first response to every quiet signal. Moving the microphone closer to the speaker can sometimes improve voice level without capturing as much environmental noise.
A well-configured microphone should make speech understandable without requiring unnecessarily aggressive processing.
DAC, Amplifier, or Audio Interface
These terms often appear in discussions about PC audio, but they describe different functions.
A digital-to-analog converter (DAC) converts digital audio data into an analog electrical signal that can ultimately drive headphones, speakers, or another analog audio stage.
Every digital gaming system that produces analog sound needs digital-to-analog conversion somewhere in the signal chain, but that converter may already be built into the computer, console, headset, monitor, or another device.
An amplifier increases the electrical signal to a level suitable for driving headphones or speakers. Again, many consumer devices already contain the amplification needed for the equipment they are designed to support.
An audio interface typically combines several audio functions in one device. Depending on its design, it may provide microphone inputs, headphone outputs, analog-to-digital and digital-to-analog conversion, gain controls, and connections for additional audio equipment.
These devices can solve specific connection, input, output, or power requirements, but they should not be treated as mandatory upgrades for every gaming audio setup.
For a simple USB headset or powered desktop speaker system, adding another audio device may provide little practical benefit. The additional hardware becomes more relevant when the existing system cannot provide the connections, microphone inputs, output power, routing, or controls the setup actually requires.
The simplest useful rule is this: start with the audio devices you need, identify a real limitation, and add another component only when it solves that limitation.
Choosing the Right Audio Connection
The connection between your gaming system and audio device determines more than where a cable plugs in. Depending on the connection, it can affect compatibility, microphone support, available software features, mobility, and how the audio signal is processed.
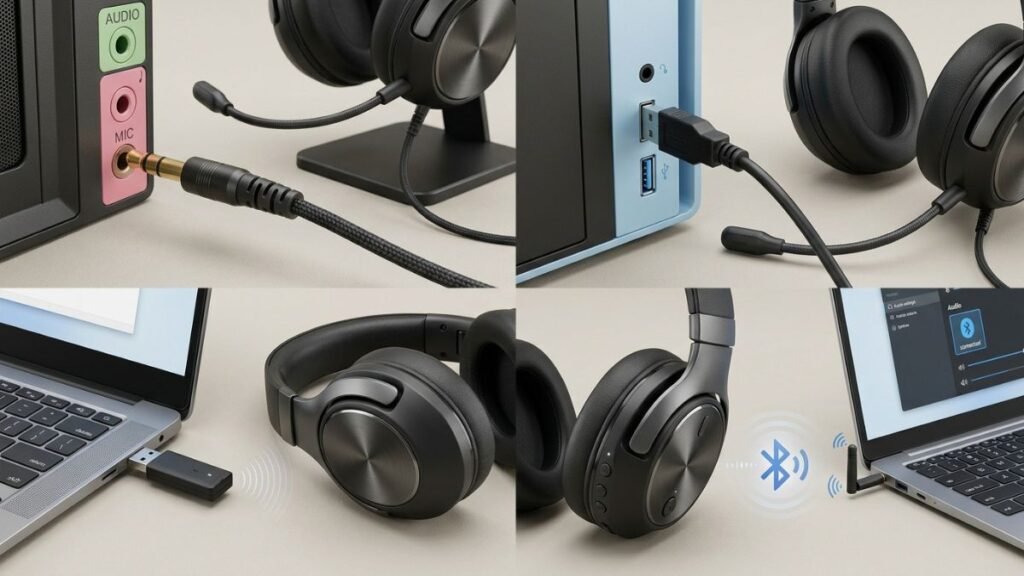
Four connection types are especially common in a modern gaming audio setup: 3.5mm analog, USB, 2.4GHz wireless, and Bluetooth. None is automatically the correct choice for every setup.
| Connection | Signal Path | Common Advantage | Main Consideration |
|---|---|---|---|
| 3.5mm analog | Analog | Broad compatibility | Relies on the connected device’s analog audio hardware |
| USB | Digital | Can combine audio and additional device features | Requires a compatible USB connection |
| 2.4GHz wireless | Digital wireless | Designed for responsive wireless communication | Usually requires a dedicated receiver |
| Bluetooth | Digital wireless | Convenient connection without a proprietary receiver | Latency and feature support depend on the devices and Bluetooth implementation |
The useful question is therefore not simply which connection is “best.” It is which connection provides the compatibility and functions your particular setup requires.
3.5mm Analog
A 3.5mm connection carries an analog audio signal between devices. It remains useful because analog headphone and audio connections are supported by many computers, controllers, monitors, speakers, and other consumer devices.
In this arrangement, digital game audio must be converted to analog before reaching the headphones or speakers. That conversion generally happens inside the PC, console controller, external audio device, monitor, or another component earlier in the signal path.
Microphone support requires additional attention. Some devices use separate headphone and microphone jacks, while others use a single combined headset connection that carries both functions.
A headset designed for one arrangement may therefore require the appropriate connector or adapter when used with another.
This makes connector compatibility worth checking before assuming that every 3.5mm port performs the same function.
For a straightforward gaming system, however, analog audio can remain perfectly practical. A digital connection is not automatically necessary simply because it is newer.
USB Audio
USB audio keeps the signal digital as it travels from the computer or console to the connected USB audio device. Digital-to-analog conversion then takes place within the headset, DAC, interface, speakers, or other USB hardware.
A USB connection can also carry more than playback audio. Depending on the device, the same connection may handle microphone input, controls, configuration data, firmware communication, or additional audio-processing features.
This can simplify a gaming setup because one physical connection may handle both input and output.
USB devices can also appear as independent audio devices in the operating system. That becomes important when several outputs are connected simultaneously. Windows, for example, may have access to monitor audio, speakers, a headset, and other outputs at the same time.
If sound suddenly comes from the wrong device, the hardware itself may be working normally—the operating system may simply be sending audio to another output.
2.4GHz Wireless
Many wireless gaming headsets use a dedicated USB transmitter or receiver rather than relying entirely on conventional Bluetooth. These systems commonly operate in the 2.4GHz radio spectrum and are designed to maintain a direct wireless connection between the headset and its receiver.
The practical advantage is freedom from the cable connecting the headset to the gaming system while retaining a connection designed specifically for the device.
The tradeoff is that the receiver becomes part of the setup. It occupies a compatible port, must remain connected, and may affect how easily the headset can move between platforms.
Wireless operation also introduces battery management. A wired headset can continue operating while physically connected, whereas a wireless device depends on its available battery power unless it supports simultaneous charging and use.
For a deeper explanation of how these connections affect headset operation, the guide to wireless gaming headsets covers wireless headset technology, latency, battery considerations, and compatibility in greater detail.
Bluetooth
Bluetooth is useful when a computer, phone, tablet, handheld device, or other compatible system can connect directly to Bluetooth audio hardware without a dedicated proprietary receiver.
That convenience does not mean every Bluetooth gaming experience behaves identically.
Bluetooth audio depends on several parts of the chain: the source device, operating system, Bluetooth hardware, drivers, supported audio features, and receiving device.
Voice communication can further change how the connection behaves because the system must handle microphone input as well as audio playback.
Newer technology is improving some of these limitations. On compatible Windows 11 systems, Bluetooth LE Audio can provide features such as improved audio quality during microphone use and support for lower-latency audio configurations.
Microsoft notes, however, that LE Audio functionality depends on compatible Windows versions, PCs, drivers, and Bluetooth audio devices.
That compatibility requirement is important. Seeing “Bluetooth” in the specifications of two devices does not guarantee that every newer Bluetooth audio feature will be available between them.
Wired vs. Wireless Is a Practical Decision
The choice between wired and wireless audio is ultimately about the needs of the setup rather than one connection being universally superior.
A wired connection eliminates battery management and can create a simple, predictable signal path. Wireless audio provides freedom of movement and can reduce the number of cables running directly to the player.
For the broader gaming audio setup, focus on four questions:
- Does the gaming platform support the connection?
- Does the connection support both the audio output and microphone functions you need?
- Does it provide the mobility or cable arrangement you prefer?
- Does it introduce another receiver, adapter, battery, or compatibility requirement?
If those questions are answered first, choosing an audio connection becomes much easier. The goal is not to use the most advanced connection available. It is to create the simplest reliable path between the gaming system and the devices you actually use.
How to Set Up Gaming Audio on a PC
Once the hardware is connected, the next step is making sure the computer sends and receives audio through the correct devices.
This becomes especially important on PCs because several audio endpoints can exist at the same time. A monitor connected through HDMI or DisplayPort may provide an audio output alongside desktop speakers, a USB headset, Bluetooth headphones, and other devices.
A reliable gaming audio setup starts by identifying which device should handle game sound and which should handle microphone input. After that, levels and application-specific settings can be adjusted without guessing where the signal is going.
Connect Your Audio Devices
Begin with the simplest possible configuration. Connect the headset, headphones, speakers, microphone, or audio interface that you actually intend to use.
The connection method determines what happens next.
An analog headset may connect through a 3.5mm jack. A USB headset or interface should normally appear as a separate audio device. A wireless headset may require its USB receiver, while Bluetooth hardware must first be paired with the PC.
Avoid changing several settings before confirming that Windows recognizes the device. If the hardware does not appear as an available input or output, changing game volume or microphone gain will not solve the underlying connection problem.
If you are working specifically with a headset, the gaming headset setup guide covers headset installation and configuration in greater detail.
Select the Correct Input and Output Devices
The output device is where you hear sound. The input device is where the computer receives audio, usually from a microphone.
These do not have to be part of the same piece of hardware.
For example, you might use desktop speakers for game audio and a separate USB microphone for communication. Another player might use one USB headset for both functions.
In Windows, the selected output can be checked through Sound settings. Microsoft recommends confirming the correct output device when troubleshooting sound, particularly when multiple audio devices are connected.
This is an important diagnostic step because HDMI and DisplayPort can carry audio as well as video. Connecting a monitor can therefore add another playback device even when you did not intend to use the monitor for sound.
The same principle applies to microphone input: confirm that the intended microphone is selected before changing its level or assuming the microphone has failed.
Some games and communication applications also provide their own device selectors. When they do, verify those settings as well. A game or voice-chat application can sometimes use a different device from the operating system default.
A useful troubleshooting rule is to trace the signal in order: source → selected output → connection → audio device. For microphones, reverse the direction: microphone → connection → selected input → application.
This simple signal-path approach can isolate many audio problems without random setting changes.
Set Volume Levels and Microphone Gain
After the correct devices are selected, establish comfortable levels before experimenting with EQ, spatial processing, or other effects.
Start with the main system output at a reasonable level, then adjust the physical volume control on the headset, speakers, amplifier, or interface if one is available. Finally, check the game’s own audio controls.
Using several volume controls at extreme settings can make troubleshooting harder because a quiet or muted stage anywhere in the chain can affect the final result.
Microphone gain deserves similar attention.
Gain determines how strongly the microphone signal is amplified before it reaches applications. Too little gain can make speech difficult to hear. Too much can increase background noise and may cause the signal to distort when you speak loudly.
Instead of immediately maximizing gain, position the microphone appropriately and speak at your normal voice level. Then raise or lower the input level until speech is consistently clear.
This is particularly useful with separate microphones, where distance from the mouth can vary significantly.
If a microphone is far away, increasing gain may also make keyboard clicks, fans, room reflections, and other environmental sounds more noticeable. Moving the microphone closer can improve the relationship between your voice and those unwanted sounds.
Test Game and Voice Chat Audio Separately
Do not assume that hearing a Windows notification means the entire gaming audio setup is configured correctly.
Test playback first. Play a known audio source and confirm that left and right channels are working as expected. Then open a game and verify that its output is reaching the same device.
Next, test the microphone independently. Windows and many communication applications provide ways to monitor or test microphone input. Speak normally rather than shouting or moving unusually close to the microphone during the test.
Finally, test game audio and voice communication together.
This matters because some problems appear only when both are active. Game sound may overpower other players, voice chat may be routed to another device, or an application may automatically change audio behavior when the microphone becomes active.
A practical balance keeps important game sounds audible while allowing conversation to remain understandable. The exact balance varies by game and personal preference, so there is no universal percentage that works for everyone.
Keep the Signal Path Simple
More software processing does not automatically produce better game audio.
Equalizers, virtual surround systems, microphone filters, audio mixers, motherboard utilities, headset applications, and in-game processing can all modify the signal. Using several layers simultaneously can make it difficult to identify which one is responsible when the sound changes unexpectedly.
For initial setup, begin with as little processing as possible.
Confirm that basic stereo playback, microphone input, device selection, and volume levels work correctly. Once the foundation is stable, add EQ, spatial audio, noise reduction, or other processing one feature at a time.
That approach creates a useful baseline. If a new setting makes the audio worse or causes a compatibility problem, you know which change is responsible.
A well-built gaming audio setup is not the one with the largest number of enabled audio features. It is the one where every part of the signal chain has a clear purpose and behaves predictably.
A great gaming audio experience also depends on how the entire gaming workspace is organized. The right gaming desk accessories can help improve equipment placement, accessibility, and overall comfort.
How to Build a Gaming Speaker Setup
A gaming speaker setup behaves differently from headphones because the sound must travel through the room before reaching your ears. Speaker position, listening distance, room surfaces, and volume therefore become part of the audio system.
You do not need a complicated multi-speaker arrangement to create useful gaming audio. A properly positioned stereo pair can provide clear left-to-right separation and a convincing sense of space.
The goal is to create a stable listening position rather than simply placing speakers wherever there is free desk space.
Exploring different gaming setup ideas can also help you understand how audio, desk layout, and other components work together to create a complete gaming environment.
Position the Left and Right Speakers Correctly
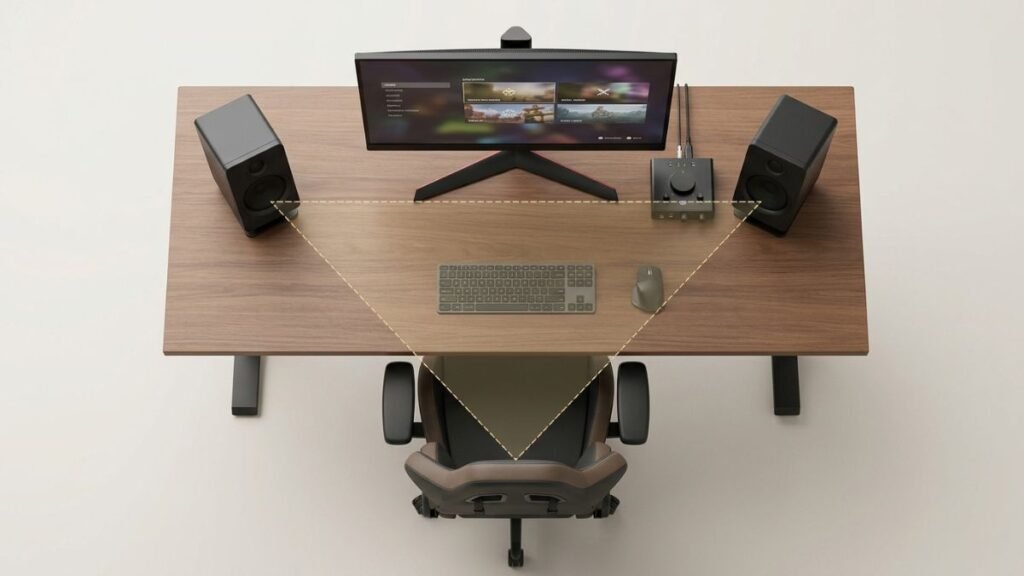
For a basic stereo gaming setup, place the left and right speakers on their corresponding sides of the display and aim them toward the main listening position when their design allows it.
The two speakers should generally have a reasonably symmetrical relationship with the player. If one speaker is much closer than the other, sounds from that side may appear disproportionately strong.
Height matters as well. For conventional desktop speakers, positioning the high-frequency drivers reasonably close to ear level can help maintain consistent high-frequency response at the listening position.
The exact placement depends on the speaker’s design, so manufacturer placement guidance should take priority when available.
Avoid treating speaker placement as purely decorative. Moving a speaker can change what you hear even when no software setting has changed.
Desk surfaces, walls, corners, and nearby objects can reflect sound. Placing speakers extremely close to boundaries can also affect bass response, although the degree varies considerably by speaker design and room.
Start with a clean, roughly symmetrical arrangement and adjust from there.
Create Clear Stereo Separation
Stereo audio uses separate left and right channels to create a soundstage between the speakers.
In games, that separation can help represent where sounds exist across the horizontal field. Music, environmental effects, dialogue, and interface sounds can also be distributed between the two channels.
If the speakers are positioned too close together, the soundstage can become narrow. If they are placed very far apart relative to the listening distance, the center image may become less coherent.
A useful starting concept is to treat the player and the two speakers as three points of a roughly balanced triangle. This is not a rigid measurement requirement for every desk, but it helps explain why speaker distance and listening position should be considered together.
Stereo imaging is the perceived placement of sounds between and around the left and right speakers. Good stereo imaging depends on the recording or game mix, speaker placement, listening position, and room—not simply on having two speakers.
This distinction matters because adding more speakers does not automatically improve positional information. A well-arranged stereo system can be more coherent than a poorly positioned multi-channel system.
Consider Your Listening Position
Speaker placement and listening position are two sides of the same problem.
A desktop gaming setup with speakers usually creates a near-field listening environment, meaning the player sits relatively close to the speakers. This can reduce some room influence compared with listening from across a large room, but reflections from the desk, walls, and nearby surfaces still exist.
Try to make the normal seated position the reference point for adjustments.
If you configure the speakers while standing beside the desk or sitting far off-center, the result may sound different once you return to the position where you actually play.
The same principle applies when two people use the system. A setup optimized for one central listening position may not produce identical stereo imaging from a seat far to one side.
This is one reason headphones and speakers create different experiences. Headphone drivers move with the listener’s head, while speakers remain fixed in the room.
Manage Bass Without Overpowering Other Sounds
Bass can add weight to explosions, engines, music, and environmental effects, but more bass does not automatically mean more accurate or useful game audio.
Excessive low-frequency energy can make a setup sound impressive initially while masking other parts of the mix. This is especially noticeable in small rooms or when a subwoofer or bass-heavy speaker is positioned near boundaries that reinforce certain frequencies.
Start with neutral or moderate bass settings rather than immediately maximizing them.
Then use familiar game scenes to listen for balance. Dialogue should remain understandable, environmental details should not disappear behind low-frequency effects, and bass should support the experience rather than dominate it.
If the system includes a subwoofer, its position can influence the bass heard at the listening position. Low frequencies interact strongly with room dimensions and boundaries, so moving the subwoofer can sometimes change the result more noticeably than changing an EQ slider.
This is a room-acoustics issue rather than a gaming-specific feature.
Set Volume for Clarity, Not Maximum Impact
Gaming speakers should be loud enough to make important details understandable without requiring unnecessarily high listening levels.
Instead of using every volume control at maximum, create a predictable gain structure. Set the computer or console output to a stable level, adjust the speakers to a comfortable listening volume, and then use individual game controls when certain titles require additional balancing.
Large differences between quiet dialogue and loud effects may come from the game’s mix or dynamic-range settings rather than the speakers themselves. Some games provide audio presets intended for headphones, speakers, home theater systems, or different dynamic ranges.
When those settings exist, choose the option that most closely represents the actual playback system before trying to correct everything with EQ.
Speakers and Voice Chat Need Extra Attention
Using speakers while a microphone is active creates an additional challenge: the microphone can capture sound coming from the speakers.
The result may be echo, feedback, or other players hearing portions of your game audio.
Reducing speaker volume can help, but microphone position also matters. Keeping the microphone closer to your mouth allows you to use less input gain, which can reduce the relative level of sound arriving from elsewhere in the room.
Directional microphones can also reject some off-axis sound, although their effectiveness depends on microphone design, placement, and the acoustics of the room.
Software echo cancellation and noise suppression may help in some communication applications, but they should not replace sensible physical setup.
If voice communication is a major part of how you play, headphones or a headset naturally isolate playback from the microphone more effectively because game audio is not being projected into the room.
For users who prefer speakers, the objective is different: keep the speakers, microphone, and listening position arranged so each component can perform its job without unnecessarily interfering with the others.
A successful gaming speaker setup is therefore less about the number of speakers and more about positioning, stereo balance, sensible volume, and control of the interaction between the audio system and the room.
How to Improve Your Gaming Audio Setup
Once the basic signal path works correctly, you can start refining the sound. This is where equalization, spatial audio, game-to-chat balance, and microphone processing can become useful.
The order matters. Processing should improve an already functional gaming audio setup, not compensate for the wrong output device, poor speaker placement, excessive microphone gain, or another basic configuration problem.
A useful approach is to establish a clean baseline first. Listen with minimal processing, make one adjustment at a time, and compare the result with the original configuration.
Adjust EQ Without Overprocessing
An equalizer, or EQ, changes the level of specific frequency ranges in an audio signal.
For gaming, EQ can be useful when certain frequencies are disproportionately strong or weak. For example, reducing excessive low-frequency energy may make other parts of a busy game mix easier to distinguish. Small adjustments can also compensate for some characteristics of headphones or speakers.
However, EQ cannot recover information that does not exist in the original game mix, and aggressive settings can create new problems.
Large boosts can make particular frequencies dominate the sound and may reduce available headroom. Extreme adjustments can also make music, dialogue, environmental effects, and other games sound unnatural.
For that reason, avoid assuming that a dramatic “gaming EQ” curve is universally better.
Different games use sound differently. A competitive multiplayer title, cinematic single-player game, racing simulator, and strategy game can have very different mixes. The headphones or speakers themselves also influence what reaches your ears.
Start with the default or neutral configuration. If you identify a specific problem, make a modest adjustment and compare it with the original sound.
Good EQ is corrective rather than automatic: change a frequency range because you can identify what needs improvement, not simply because an audio application provides an equalizer.
Configure Spatial Audio Carefully
Spatial audio attempts to create a stronger perception that sounds originate from positions around the listener rather than only from conventional left and right channels.
This can be achieved through different technologies. Some games provide their own headphone spatialization, while operating systems and audio applications can also offer spatial processing.
Windows includes Windows Sonic for Headphones as a built-in spatial sound option. Microsoft also notes that additional spatial audio solutions, including Dolby Access and DTS Sound Unbound, can be used through Windows when supported by the system and installed software.
Spatial processing can be useful for games designed to provide positional audio information, but enabling more than one virtualization system at the same time is not necessarily beneficial.
For example, if a game already performs headphone-specific 3D audio processing and another spatial layer is added afterward, the second processor may alter cues that the game’s audio engine already created.
That does not mean double processing always causes an obvious problem. It means the complete signal chain should be understood before enabling multiple effects.
When testing spatial audio, compare it against ordinary stereo using the same game, scene, volume, and playback device. Listen for whether positions become easier to interpret rather than simply whether the sound becomes wider or more dramatic.
Our guide to surround sound gaming headsets explains virtual surround, spatial processing, and their practical limitations in greater detail.
Balance Game Audio and Voice Chat
Multiplayer gaming often requires two competing audio sources: the game and the people communicating with you.
If game volume is too high, teammates can become difficult to understand during loud scenes. If voice chat is too dominant, important game sounds may become harder to hear.
There is no universal game-to-chat ratio because games, communication applications, microphones, and player preferences vary.
Instead, establish the balance under realistic conditions.
Use a normal gameplay sequence rather than a quiet menu screen. Ask another person to speak at an ordinary level, or use a voice-chat test when available. Adjust the two sources until conversation remains understandable without making the game unnecessarily quiet.
Some headsets, applications, consoles, and operating systems provide separate game and communication channels or controls. When those features are available, they can make adjustments easier because one source can be changed without significantly altering the other.
The important principle is consistency. Once a useful balance is established, avoid compensating for every individual situation by repeatedly changing the master system volume.
Reduce Background Noise at the Source
Microphone software increasingly offers noise suppression, noise gates, automatic gain control, echo cancellation, and other processing. These tools can be useful, but physical improvements should generally come first.
Consider a microphone picking up a mechanical keyboard.
Increasing noise suppression may reduce some keyboard sounds, but it can also affect the voice if processing becomes aggressive.
Moving the microphone closer to the mouth and farther from the keyboard improves the relationship between the wanted signal and unwanted noise before software processing begins.
The same principle applies to fans, air-conditioning systems, speakers, and room reflections.
Start by identifying the source of the unwanted sound.
Then consider whether you can:
- Move the microphone closer to the speaker.
- Move or redirect the noise source.
- Lower unnecessary microphone gain.
- Reduce sound reflecting from nearby surfaces.
- Apply software processing only after the physical setup is reasonable.
This order makes troubleshooting easier because each change has a clear purpose.
Avoid Stacking Unnecessary Audio Processing
A modern gaming PC can process the same signal at several stages.
A game may have its own EQ or spatial system. The operating system can add enhancements. Headset software may apply another EQ, surround effect, compressor, or bass enhancement. Communication software can process the microphone separately.
Individually, these features may work as intended. Together, they can create a signal chain that is difficult to understand.
If the sound becomes unnatural after enabling several enhancements, disable the processing layers and return to the basic configuration. Then restore one feature at a time.
The same troubleshooting method works for microphones. If voice quality suddenly changes, determine whether noise suppression, automatic gain, echo cancellation, or another processor is active in more than one application.
More processing is not the same as more accurate audio.
Use the Game’s Audio Settings as Part of the System
The final stage of a gaming audio setup is often inside the game itself.
Games may provide settings for master volume, effects, dialogue, music, dynamic range, speaker configuration, headphone mode, voice chat, and spatial audio. These controls can affect the signal before it reaches Windows or your playback hardware.
Speaker configuration deserves particular attention.
If a game is configured for a multi-channel speaker system while you are actually using ordinary stereo playback, the signal may not be processed in the way you expect. Likewise, a dedicated headphone mode may use different processing from a speaker-oriented mode.
Dynamic-range options can also change the listening experience. A wide dynamic range preserves a larger difference between quiet and loud sounds, while compressed modes reduce that difference.
The appropriate setting depends on the game, environment, and listening needs rather than one mode being universally superior.
For this reason, troubleshooting should include the game itself rather than focusing exclusively on Windows or the hardware.
A reliable optimization sequence is:
hardware and placement → connection → operating-system devices → basic levels → game settings → optional processing.
Following that order makes each adjustment easier to understand and gives the entire audio system a stable foundation.
Common Gaming Audio Setup Mistakes
Many gaming audio problems are not caused by defective hardware. They come from small configuration errors somewhere between the game, operating system, connection, playback device, microphone, and listening environment.
Recognizing these mistakes can save time because it encourages systematic troubleshooting instead of immediately replacing equipment or adding more processing.
Using the Wrong Audio Output
One of the simplest mistakes is also one of the easiest to overlook: the game is sending sound to a device you are not actually using.
A PC connected to a monitor through HDMI or DisplayPort may recognize that display as an audio output. Add speakers, a USB headset, and Bluetooth headphones, and several playback devices can become available simultaneously.
The result can be confusing. The game appears to be running normally, the volume indicator moves, and the headset is connected—but no sound reaches your ears.
Before changing drivers, EQ, or game settings, verify the active output device.
Also check the game itself when it provides an independent audio-device selector. The Windows default and the output selected inside an application do not always have to be the same.
Selecting the Wrong Microphone
The same problem can occur on the input side.
A computer may detect a headset microphone, webcam microphone, standalone USB microphone, laptop microphone, and audio-interface input at the same time.
If other players cannot hear you, do not immediately increase microphone gain.
First confirm that the application is listening to the microphone you intend to use.
This is especially important after connecting a new headset or webcam because the operating system or application may make a newly detected device available without it being the microphone you actually want.
Setting Microphone Gain Too High
When a microphone sounds quiet, increasing gain seems like an obvious solution. The problem is that gain also raises the level of unwanted sound reaching the microphone.
Keyboard clicks, computer fans, room reflections, air conditioning, and speaker audio can all become more noticeable.
Excessive input level can also cause distortion when speech becomes loud.
A better approach is to work physically first. Position the microphone at an appropriate distance from your mouth, speak normally, and then set the input level.
Microphone gain should provide enough level for clear speech without unnecessarily amplifying the surrounding room.
This approach creates a cleaner starting signal before noise suppression or other software processing is introduced.
Enabling Every Audio Enhancement
Gaming software often presents features such as bass boost, virtual surround, spatial audio, EQ presets, loudness processing, dialogue enhancement, and other effects.
Enabling all of them does not create an automatically superior gaming audio setup.
Multiple processors can alter the same signal in different ways. An EQ preset may boost frequencies that another enhancement is already changing. A game may generate spatial headphone audio before another application applies additional virtualization.
When several layers are active, even identifying the source of an unwanted sound becomes difficult.
Start with basic stereo playback and minimal processing. Once that works correctly, introduce one enhancement at a time and determine whether it produces a useful improvement.
If you cannot identify what a feature improves, there is little reason to keep it enabled simply because it is available.
Assuming Surround Sound Is Always Better
Terms such as surround sound, 3D audio, and spatial audio can suggest that enabling them will automatically provide better positional information.
The reality is more dependent on the signal chain.
Some games perform their own positional audio processing. Headset software or the operating system may provide another virtualization layer. The final result depends on how those systems interact and what signal each processor receives.
This is why spatial audio should be evaluated rather than automatically enabled.
Compare spatial processing with ordinary stereo under similar conditions. If positioning becomes clearer or the experience becomes more convincing, the processing may be useful for that configuration.
If sounds become less precise or unnaturally diffuse, returning to a simpler signal path may produce a better result.
Positioning Desktop Speakers as an Afterthought
A pair of capable speakers can still produce an unbalanced result when one speaker is significantly closer to the listener, hidden behind a monitor, positioned at a very different height, or placed without considering the normal seating position.
Speaker placement is part of the audio system.
Start with the left and right speakers arranged around the primary listening position rather than around whatever desk space happens to remain available.
Small positioning changes can affect stereo imaging and tonal balance without requiring any software adjustment.
This also explains why copying another person’s speaker arrangement is not guaranteed to reproduce the same result. Desk dimensions, room boundaries, listening distance, furniture, and speaker design can all differ.
Choosing the Wrong In-Game Audio Mode
Many games provide audio presets or output modes designed for different playback systems.
A title may offer separate settings for headphones, stereo speakers, home theater systems, dynamic range, or spatial audio.
Selecting a mode that does not represent the actual playback system can change how the game prepares its audio before the signal even reaches your operating system.
When troubleshooting, check these settings before trying to compensate with external EQ.
If you use headphones, determine whether the game provides a dedicated headphone mode. If you use stereo speakers, verify that the game is not configured for a multi-channel system you do not have.
The names and behavior of these settings vary between games, so there is no single preset that should be selected universally.
Ignoring Game-to-Chat Balance
A technically correct setup can still be difficult to use when game audio and voice communication compete for attention.
Turning the overall volume up does not solve the problem because both sources may become louder together.
Instead, treat game sound and communication as separate elements when the software or hardware allows it. Adjust them under realistic gameplay conditions until speech remains understandable without eliminating important game audio.
This becomes particularly important in games with large changes in volume between quiet and intense scenes.
Trying to Fix Hardware Problems With Software
EQ cannot repair a loose connector. Noise suppression cannot correct a microphone that is positioned poorly. Spatial processing cannot make a disconnected speaker work. A driver update cannot recharge a wireless headset with an empty battery.
Software troubleshooting should come after basic physical checks.
When a problem appears suddenly, ask what changed.
Was a new device connected? Was the headset switched from wired to wireless mode? Did an application change its selected output? Is the wireless device charged? Was the microphone moved? Was a new audio enhancement enabled?
Working backward from the most recent change can often reveal the problem faster than changing multiple unrelated settings.
Changing Too Many Settings at Once
This is one of the most important troubleshooting mistakes.
Suppose game audio suddenly sounds unusual. You change the EQ, enable spatial audio, reinstall a driver, alter the sample format, switch USB ports, and change the game’s audio preset.
If the problem disappears, you still do not know which change solved it.
If the problem becomes worse, you now have several new variables to investigate.
Instead, change one thing at a time and test the result.
A useful troubleshooting sequence is:
- Confirm physical connections and power.
- Confirm the correct input and output devices.
- Check system and application volume levels.
- Verify the game’s audio configuration.
- Disable unnecessary processing.
- Test the device again.
- Add optional processing only after basic audio works.
This method is slower than randomly changing settings for the first few minutes, but it is usually faster at identifying the actual cause.
The central principle is simple: a reliable gaming audio setup should be understandable. You should know which device produces the sound, how that signal reaches you, which microphone captures your voice, and which software layers modify either signal.
When that path is clear, both configuration and troubleshooting become much easier.
Conclusion
A reliable gaming audio setup starts with understanding the signal path rather than adding unnecessary hardware or enabling every available audio feature. Your headset, headphones, speakers, microphone, connections, operating-system settings, and game settings all need to work together.
Start with the simplest configuration that meets your needs. Confirm the correct input and output devices, establish comfortable levels, position speakers or microphones properly, and test basic audio before adding EQ or spatial processing.
Most importantly, make changes for a specific reason. A feature is useful when it solves a real problem or improves the listening experience—not simply because it is available.
Whether you play through a headset or a gaming setup with speakers, a clear and predictable signal path makes the system easier to configure, use, and troubleshoot.
Once that foundation is working correctly, you can explore more advanced audio features according to your platform, games, and listening preferences.
A complete gaming environment also requires proper organization, and gaming cable management helps keep audio cables, power connections, and other accessories easier to manage.
Frequently Asked Questions About Gaming Audio Setup
What do I need for a gaming audio setup?
A gaming audio setup needs an audio output device, such as headphones, a headset, or speakers, plus the correct connection to your gaming system. If you use voice chat, you also need a microphone. DACs, amplifiers, mixers, and audio interfaces are optional components that become useful when they solve specific connection, routing, input, or output requirements.
Is a headset or speakers better for a gaming audio setup?
Neither is universally better for a gaming audio setup. Headsets provide private listening and keep game sound physically separated from the room, which can simplify voice communication. Speakers provide an open listening experience but depend more heavily on placement and room acoustics. The appropriate option depends on your environment, communication needs, and preferred way of playing.
Does a gaming audio setup need a DAC?
A gaming audio setup does not automatically need a separate DAC. Digital audio must be converted into an analog signal somewhere in the audio chain, but that conversion may already happen inside a computer, console controller, USB headset, audio interface, monitor, or speaker system. An external DAC makes sense when it addresses a specific requirement rather than simply being added as an assumed upgrade.
Is USB or 3.5mm better for a gaming audio setup?
USB and 3.5mm connections handle audio differently, but neither is automatically better for every gaming audio setup. A 3.5mm connection carries an analog signal and can offer broad compatibility. USB carries digital audio to a compatible device and can also support microphone input, controls, or additional features. Platform compatibility and required functions should determine the connection.
Can Bluetooth be used for a gaming audio setup?
Bluetooth can be used in a gaming audio setup when the gaming system and audio device support compatible Bluetooth audio features. Performance can vary according to the hardware, operating system, drivers, Bluetooth implementation, and whether microphone communication is active. Newer technologies such as Bluetooth LE Audio can improve certain capabilities on compatible systems, but support should not be assumed from the Bluetooth label alone.
How can I improve the sound of my gaming audio setup?
Improve a gaming audio setup by correcting basic configuration before adding processing. Verify the output device, set sensible volume levels, position speakers or microphones appropriately, and select the correct in-game audio mode. After establishing a reliable baseline, test EQ or spatial audio individually. Keep an adjustment only when you can identify a practical improvement.
Should I use surround sound in my gaming audio setup?
Surround or spatial processing can be useful in a gaming audio setup, but it should be evaluated with the games and playback devices you actually use. Some games already provide positional headphone processing, while operating systems and headset software may add separate virtualization. Compare spatial processing with standard stereo rather than assuming that enabling additional processing will always improve positional audio.